Skip to content

New Leica to NEX smart adapter by Phigmenttech.

Share

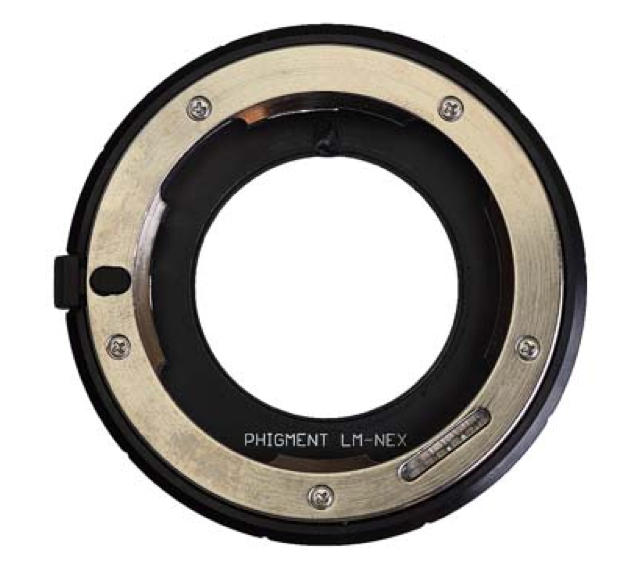
Paul from Phigmenttech sent me this eMail to present the new Leica to NEX smart adapter you cna buy right now on phigmenttech’s site (Click here).

This adapter will modernize your Leica lenses with the following feathres:

Coded Lens Identification (fills in EXIF):
-Allow for Leica coded lenses to automatically send identification to the NEX camera. This means correct focal length and aperture range data in your EXIF.
-You are not limited to coded Leica lenses. You can use other M-mount lenses which will use a ‘default’ user selected setting for EXIF data.

Focus Coupling:
-This adapter will pick up the RF movement and send it to the NEX camera to auto invoke the focus assist; you can now free up one more button  for customization (if you were already using it for MF assist).

Peripheral illumination correction:
-I have provided a method for defining the level of vignetting correction. This is disabled by default, but it can be enabled.

Easy configuration:
-The adapter can easily be configured by the end user via a simple computer interface.
-Adjust default ID setting for non-coded lense
-Enable/disable focus assist engage
-Define lens properties (focal length and aperture range)
-Enable/disable ‘profiles’

Firmware Updatable:
-Firmware updates can easily be applied by the user without the need to mail it back

User manual and other details can be found at the product page: https://www.phigmenttech.ca/lmnex/index.php?page=product

Oh.. one thing to note. This is only available in Canada/USA at the moment until I raise enough funds to get CE testing done to allow sales in Europe.

Thanks Paul!


Share
Back To Top

Looks like your ad blocker is on.

×

We rely on ads to keep creating quality content for you to enjoy for free.

Please support our site by disabling your ad blocker.

Continue without supporting us

Choose your Ad Blocker

  • Adblock Plus
  • Adblock
  • Adguard
  • Ad Remover
  • Brave
  • Ghostery
  • uBlock Origin
  • uBlock
  • UltraBlock
  • Other
  1. In the extension bar, click the AdBlock Plus icon
  2. Click the large blue toggle for this website
  3. Click refresh
  1. In the extension bar, click the AdBlock icon
  2. Under "Pause on this site" click "Always"
  1. In the extension bar, click on the Adguard icon
  2. Click on the large green toggle for this website
  1. In the extension bar, click on the Ad Remover icon
  2. Click "Disable on This Website"
  1. In the extension bar, click on the orange lion icon
  2. Click the toggle on the top right, shifting from "Up" to "Down"
  1. In the extension bar, click on the Ghostery icon
  2. Click the "Anti-Tracking" shield so it says "Off"
  3. Click the "Ad-Blocking" stop sign so it says "Off"
  4. Refresh the page
  1. In the extension bar, click on the uBlock Origin icon
  2. Click on the big, blue power button
  3. Refresh the page
  1. In the extension bar, click on the uBlock icon
  2. Click on the big, blue power button
  3. Refresh the page
  1. In the extension bar, click on the UltraBlock icon
  2. Check the "Disable UltraBlock" checkbox
  1. Please disable your Ad Blocker
  2. Disable any DNS blocking tools such as AdGuardDNS or NextDNS
  3. Disable any privacy or tracking protection extensions such as Firefox Enhanced Tracking Protection or DuckDuckGo Privacy.

If the prompt is still appearing, please disable any tools or services you are using that block internet ads (e.g. DNS Servers, tracking protection or privacy extensions).