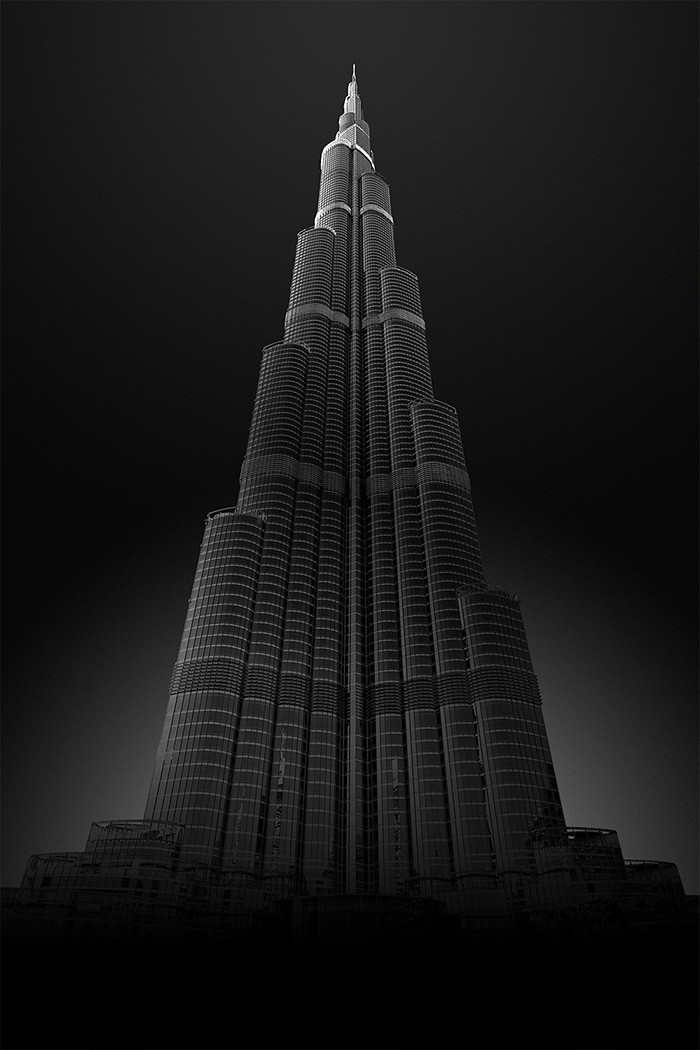
The Burj Khalifa – Dubai – UAE shot (by Minas Stratigos)
post-4744-0-51401900-1451946824Minas Stratigos on SonyAlphaForum
Burj Khalifa – Dubai
Shot with a6000, Sony 10-18 OSS lens
Please visit my flickr profile for more photos https://www.flickr.com/photos/stratigm/

I noticed Minas Stratigos Burj Khalifa shot got some attention on SAR and our SonyAlphaForum. People asked how he “created” that image. I asked Minas Stratigos to explain how he took the image. He kindly sent me that guest post article:

—-

VISION
I was looking for a view of the Burj Khalifa that would be pleasing to my eye, my aim was to capture the whole building in one frame. I took different shots from around the building and I selected this photo as it had the best composition. I wanted to show not only the height of the building (tallest artificial structure in the world – 829.8 meters) but also its massive volume.
I was disappointed because the day I was there the sky was bright blue with no clouds in sight (I was looking for a long exposure to catch a few cloud streaks), so that’s when I decided that my image would have a black sky with different shades of white. I envisioned my photo to lead the eye from a total black look at the bottom to a bright top through different zones of B&W.

MY WORKFLOW
I use to follow a specific workflow to create my images, see below the basic steps I follow:

in Adobe Camera Raw
Clean spots if any,
Level and crop the image,
Adjust exposure, contrast, highlights etc and then open the file in CC 2015
in Photoshop
Reduce noise where required (by the way, with Sony a6000 I get less noise than my brand new A7RII in long exposures)
Create luminosity masks on the colored image
Create the hard selection (usually to isolate sky from buildings but not only)
Convert to B&W, usually three exposures Under, Normal, Over
Darken the sky
Work on different layers, based on the normal exposure and adjust contrast by using luminosity masks, curves, levels and gradients
Create the lights based on the envisioned image using gradients and brushes
Add grain
Dodge and Burn layer (50% grey, soft light)
Selective sharpening with one or more high pass filters
Final retouches

TECHNICAL DETAILS
This image was shot with the Sony a6000 and my favorite lens the E 10-18mm F4 OSS at 13mm (I even use it with the a7RII, works well between 13-16mm), f8, 1/250 and ISO 100
For more of my images and updates online visit either my flickr account https://www.flickr.com/photos/stratigm/
Or 500px https://500px.com/minasstratigos
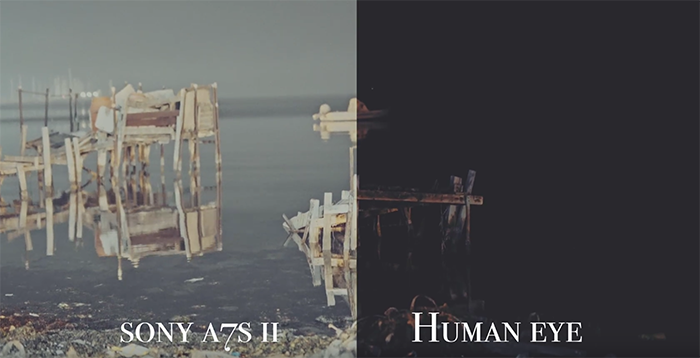
New Commlite Nikon F to Sony E test video (with Nikon and Tamron F mount lenses).

Sharpest Light Limited posted that new video shot on the Commlite Nikon F autofocus adapter:

Commlite Nikon F to Sony E Electronic adapter will be shipped out of the factory in next week. The adapter firmware to be launched will be version 2.0 rather than version 1.0 currently on our hand. Commlite promises that focus performance for the long range lens will be improved. The supporting list will be finalized in this week.

Lenses tested on video:
00.05 [shoplink 43868 ebay]Nikon 300mm F2.8[/shoplink]
02.00 [shoplink 43869 ebay]Nikon 12-24mm F2.8G AF-S[/shoplink]
03.00 [shoplink 43869 ebay]Nikon 12-24mm F2.8G AF-C[/shoplink]
03.40 [shoplink 43870 ebay]Tamron 35mm F1.8[/shoplink]
04.10 [shoplink 43871 ebay]Tamron 45mm F1.8[/shoplink]
05.03 [shoplink 43872 ebay]Tamron 15-30mm F2.8[/shoplink]
05.26 [shoplink 43873 ebay]Tamron 150-600mm F5.6-6.3[/shoplink]
06.00 [shoplink 43874 ebay]Tamron 16-300mm F3.5-5.6 APSC[/shoplink]
06.30 [shoplink 43875 ebay]Tamron 17-50mm F2.8 APSC[/shoplink]

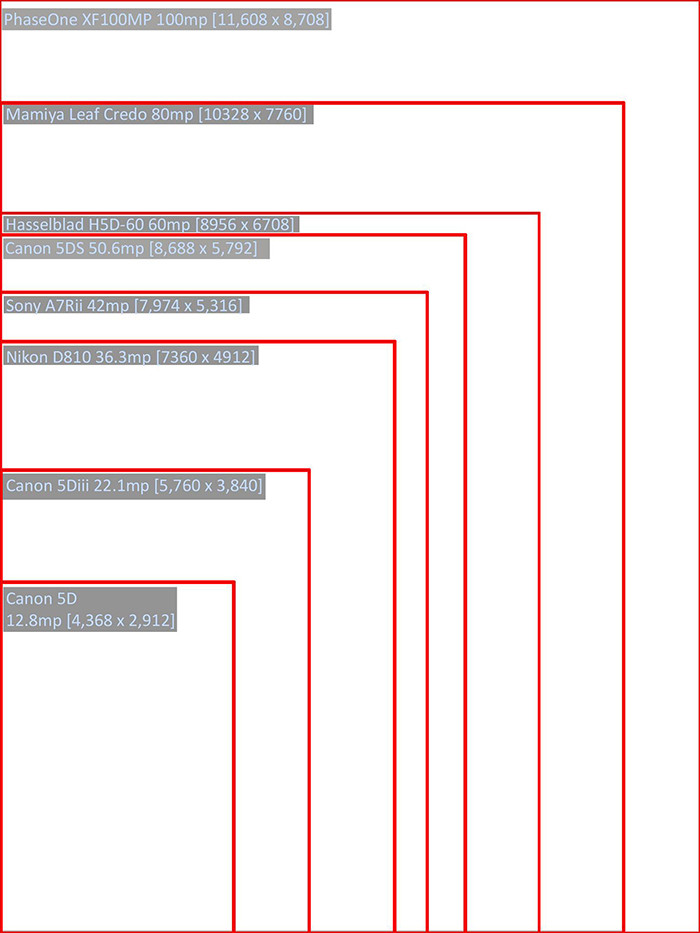
This is the resolution difference between the Phase One Sony 101 MP and A7rII 42MP sensor!

phaseone

Brianandcamera created that illustration to show the resolution difference between the new Phase One 101 Megapixel Sony sensor and the rest of the digital world. Brian writes:

I had a bit of trouble wrapping my head around it. I currently shoot on a 24MP body and the difference between their old camera and the new (80 -> 100) was basically my camera. I wanted a frame of reference, so I dug up some filesize information and created the guide below. I grabbed one of the 100MP tiffs and compared the dimensions:

PhaseOne-XF100MP-Comparison-small,large.2x.1451953170
There is also a massive original non resized version posted by PetaPixel on Flickr.

First Zonlai 25mm E-mount lens unboxing and impressions.

[shoplink 43686 ebay]Zonlai[/shoplink]

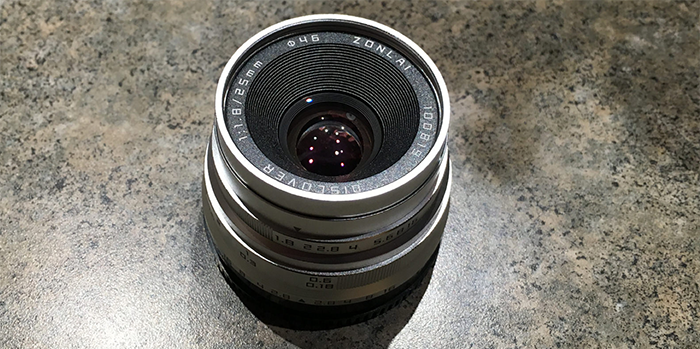
SAR reader Vitaly got the new Zonlai 25mm f/1.8 E-mount lens that sells for $129 on [shoplink 43686 ebay]eBay (Click here to read all details on eBay)[/shoplink]. He shared some unboxing pics and image samples on Flickr (Click here):

Did some test pictures and process of unpacking. Impression: Well build, good quality pictures. On downside -very short, narrow turn for focusing. Also my copy has small mark/dot inside metal part that not affect optic.

Lens Features:
Focal Length: 25mm
Aperture Range: F1.8-16
Focusing Range: 18cm-Infinite
Dimensions: Ф60mm X 33mm
Weight: 142g
Materials: Multi-coated Optical Glass / Metal body
Color: BLACK/SILVER
Available on [shoplink 43686 ebay]eBay[/shoplink]

Thanks Vitaly!

Phase One XF 100MP uses similar A7rII sensor tech. First short image test impressions.

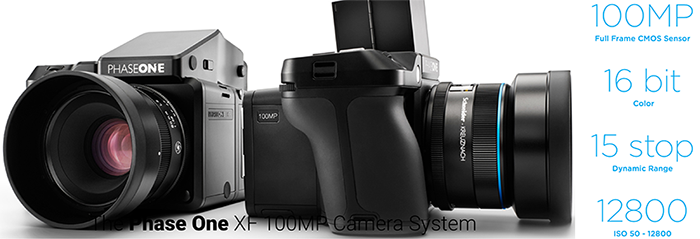
Today Phase One has announced the XF 101 megapixel back. The CMOS sensor was developed by Sony and uses a similar [shoplink 43671 ebay]Sony A7RII[/shoplink] sensor design. Phase One says this is a “Full Frame” sensor. What they mean is that it has the real field-of view size of 53.7 x 40.4mm. It means unlike previous Phase One backs there is no crop.

no_noise
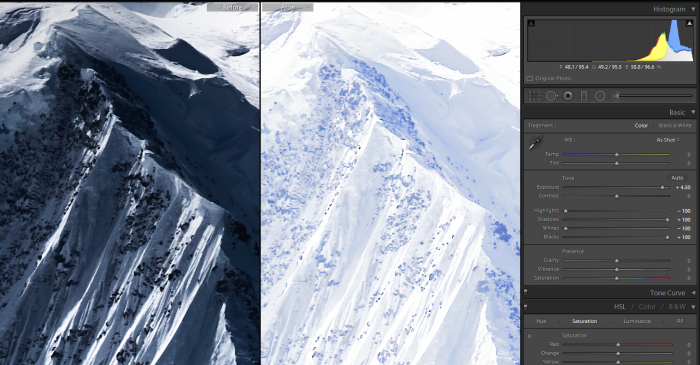
Original Phase One 101 MP file (left) and 4.5 stop overexposure (right). Image courtesy by Ori Cohen

Our reader Ori Cohen made a short test with the files available for download at Phase One’s website:

“The XF 100MP boasts at being the “ultimate camera system”, powered by the world’s first 100MP sony sensor. Phase One generously gave us a few TIF sample files to inspect, and they are simply stunning. This much detail is every photographer’s dream, but it comes at a high cost of not just money, but also processing power. My system can handle huge files, but editing a 500MB TIF demands more than an I7 and 32GB of memory. I was excited to see that one of the files was under-exposed. The image in question is the dramatic mountain that was shot at ISO100, and its histogram is leaning to the left, with the help of LR I recovered the shadows and blacks in order to see if there was any noise in the shadows. In fact, the majority of the image’s pixels are dark blue\gray. Recovery of the shadows and blacks to 100% did not show any noisy pixels. In a second attempt to force the noise to appear, I pushed the “exposure” slider by +4.5 stops, and there was still no noise! obviously the highlights and whites were blown, but with a small amount of highlights and whites recovery they stayed within the histogram. The only reason I did not add +5 FULL stops of exposure was because the highlights and whites recovery sliders’ range is too narrow for this 16 bit file and can’t push the over exposed pixels to the left of the histogram. Although this observation was done at the optimal ISO, as a comparison I could not recover a similarly under-exposed A99 RAW file without seeing noise at ISO 100. I believe that this camera can recover shadows by more than 4.5 stops without showing noise artifacts, but in order to do that Adobe needs to give us the ability to dial in more than 5 stops in each direction, and extend the shadow/darks/highlights/whites recovery range.”

Tamron SP 15-30mm gets DxOmarked: Is the best bang for the buck!

tamron_15_30mm

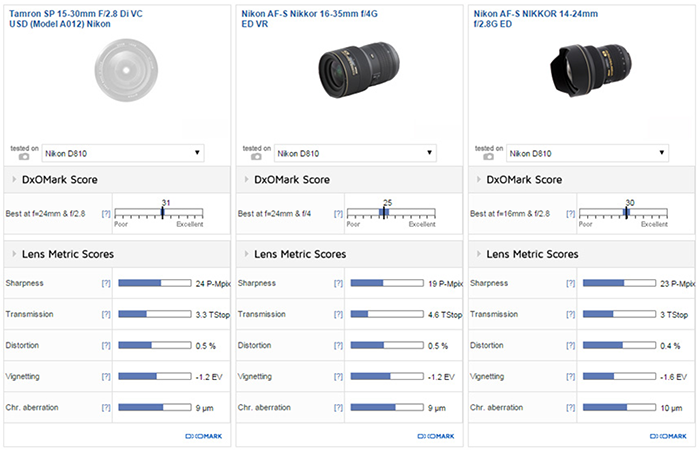
DxOmark (Click here) tested the Tamron 15-30mm SP lens. They used the F-mount version on the D810 which uses the same A7r sensor. The A-mount lens can be ordered at BHphoto (Click here) and at Adorama (Click here). So how good is the lens? DxO writes:

All lenses are a compromise, but the Tamron has a good balance, with high central sharpness wide-open and sharpness improving across the frame on stopping down, and with generally good control of chromatic aberration. On the downside, it has some slight field curvature at 30mm and it has quite high levels of both barrel and pincushion distortion that are more noticeable than the Nikkor equivalents.
However, at least the Tamron doesn’t exhibit complex distortion, so it should be relatively easy to correct with software. In physical terms, the lens is large and heavy and doesn’t cover the popular 35mm focal length, but as a 24-47mm equivalent on an APS-C-format DSLR, it remains a versatile offering. Combined with its good performance and the lure of built-in stabilization, at around $1,200 it looks very tempting.

DxOmark (Click here) also tested the Sony DT 16-50mm F2.8 SSM lens:

Although the Sony has good center sharpness throughout much of the range, the exception is at 50mm, where field curvature can be problematic and stopping down doesn’t help. It also has quite noticeable chromatic aberration at the edges of the frame at 16mm and when stopped-down mid-range (24-35mm), making it look like a somewhat problematic lens. On balance, however, after taking the high speed aperture, stabilization, sonic type motor and price into account, it remains an attractive option for Sony users. But if brand loyalty isn’t a concern, potential buyers could look at the offerings from Sigma or Tamron.